5. Camshaft
...
2025-08-14 19:10
2241
5. Camshaft
Conclusion
- Slipping Gears If the vehicle struggles to stay in gear or feels like it is slipping during acceleration, this could be a sign of inadequate lubrication.
Understanding the Price of Laser Land Leveler Machines
Furthermore, online buying platforms cater to a diverse range of consumers, including those who may be hesitant to visit dealerships due to various reasons, such as time constraints or discomfort with the selling environment. The availability of virtual tours, 360-degree views of cars, and live videos conducted by sales representatives enables buyers to experience vehicles as if they were physically present. This level of engagement reduces the barriers to entry and attracts a more extensive customer base.
1. Diagnosis of Engine Problems By measuring compression, you can identify issues like leaks or wear that might not be obvious during visual inspections.
In recent years, the pickup truck has solidified its status as more than just a work vehicle; it has become a cultural icon in America. From construction sites to suburban neighborhoods, the pickup truck represents versatility, strength, and a connection to the outdoors. This article explores the evolution of the pickup truck, its impact on American culture, and its future in an ever-changing automotive landscape.
สูตรชาสซี (Chassis Formula) ที่เราจะพูดถึงในวันนี้ นั้นเกี่ยวข้องกับการออกแบบเพื่อให้ได้สมรรถนะที่ดีที่สุด โดยทั่วไปแล้ว สูตรเหล่านี้จะคำนึงถึงหลายปัจจัย เช่น น้ำหนักของรถ ขนาดล้อ ฐานล้อ (Wheelbase) และตำแหน่งของศูนย์ถ่วง (Center of Gravity) ซึ่งทุกองค์ประกอบนี้มีผลต่อการควบคุมรถและความเสถียรขณะขับขี่
4. Chandeliers and Ceiling Rose These decorative fittings not only provide illumination but also house the connections for the wiring. They play a dual role in both aesthetics and functionality.
Agro Power Machinery Store stands out as a leader in the agricultural machinery industry, combining quality products, advanced technology, exceptional customer service, and a commitment to sustainability. By continuously updating their inventory to include the latest innovations and maintaining a focus on customer satisfaction, they are well-equipped to meet the evolving needs of farmers. If you are looking to enhance your agricultural operations, look no further than Agro Power Machinery Store—your one-stop solution for all your agricultural machinery needs. Embrace the future of farming with the right tools at your disposal!
There are several types of brake drums used in trucking, each tailored to specific applications. Standard brake drums are common in many heavy trucks, while others may feature enhanced designs for performance-oriented systems. For instance, vented brake drums are designed to allow air circulation, helping to dissipate heat more effectively during brake application, thereby reducing the risk of brake fade.
3. Retirer le tambour Retirez le tambour de frein en le tirant tout simplement. Parfois, il peut être nécessaire de taper légèrement pour le débloquer. Vérifiez l'état du tambour pour vous assurer qu'il n'est pas trop usé ou endommagé.
Neem de nieuwe remschoenen en installeer deze volgens de aantekeningen of foto’s die je eerder hebt gemaakt. Zorg ervoor dat je remvet aanbrengt op de contactpunten om een soepele werking te garanderen. Plaats de veren weer terug op hun plek om de remschoenen stevig vast te zetten.
Before you start painting, it's crucial to clean the drum brakes thoroughly. Any dirt, grease, or old paint should be removed to ensure good adhesion. A wire brush or sandpaper can be used for this purpose, followed by a brake cleaner to eliminate any residues. Once the surface is clean and dry, you can proceed with applying the brake paint.
1. Regular Inspections Have your brake system inspected routinely by a qualified mechanic. This allows for the identification of issues before they escalate.
Анімацыя здольна наглядна ілюстраваць гэты працэс. Вы можаце ўбачыць, як тормазныя колкі павялічваюцца, націскаючы на барабан, і як сілы трэння затрымліваюць кола. Гэта адбываецца дзякуючы ўжыванню фізічных законаў, асабліва законаў руху і трэння.
For vehicle owners who prefer a DIY approach, always consult your vehicle's manual for specific guidelines on lubrication and brake services. Alternatively, seeking the assistance of a qualified mechanic can provide peace of mind that the job is done correctly and safely.
The disco era of the 1970s brought about significant shifts in automotive design. Cars became more powerful and faster, which in turn created a demand for advanced braking systems. In response, engineers began to revolutionize traditional drum brakes. This transformation involved better materials, such as composite lining and stronger metals, which enhanced heat dissipation and durability. These innovations enriched the performance of drum brakes, allowing them to handle more power without compromising safety.

Het Belang van de Forge Stand voor Remtrommels
5. پیچ آسیب دیده را شناسایی کنید
Mechanical drum brakes have been a fundamental component in automotive and heavy machinery braking systems since their inception. Their design and functionality have evolved significantly over the years, yet their basic principles remain largely unchanged. This article delves into the workings of mechanical drum brakes, providing insight into their structure and operation.
Avant de reprendre la route, faites un essai. Assurez-vous que tout fonctionne correctement et qu'il n'y a pas de bruits anormaux. Un remplacement réussi du goujon de roue contribue à votre sécurité sur la route. Si vous avez des doutes, n'hésitez pas à consulter un professionnel.
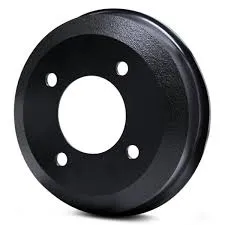
A drum brake kit typically includes several essential components the brake drum, brake shoes, return springs, adjusters, and wheel cylinders. Each part works in concert to provide optimal stopping power. The brake drum, which is a cylindrical housing, rotates with the wheel, and the brake shoes press against it to create friction, slowing the vehicle down. Over time, these components can wear out due to constant use, which is why having access to a drum brake kit can be invaluable for routine maintenance and repair.
- Use Quality Parts When replacing brake components, always opt for high-quality parts that meet or exceed manufacturer specifications.
Changing rear drum brakes can be a rewarding DIY project that saves you money on labor costs while ensuring your vehicle remains safe on the road. Understanding the steps involved and having the right tools at hand will make this process smoother. Here’s a comprehensive guide on how to change rear drum brakes.
El Hub del Tambor de Frenos Un Componente Esencial en la Mecánica Automotriz
Consequences of Brake Drum Lift
Regular inspection of drum brake springs is vital for maintaining optimal vehicle safety. Signs of wear may include rust, brittleness, or deformation of the springs. If any of these issues are observed, it is highly advisable to replace the affected springs promptly. Ignoring these indicators can lead to more severe problems down the line, including complete brake failure.
Étape 8 Test
For instance, the brake spring tool allows technicians to safely compress and remove the tightly wound springs that hold the brake shoes in place. This tool is designed to reduce the risk of injury from spring recoil, a common hazard when working on drum brakes. Similarly, the brake adjuster tool simplifies the adjustment of the brake shoes to ensure optimal performance. This is crucial, as improper adjustment can lead to decreased braking efficiency and increased wear on components.
2. Nettoyage des composants
ドラムブレーキの基本的な構造には、主にドラム、シュー、シリンダー、スプリングなどの部品が含まれています。ドラムは車輪に取り付けられ、車両の回転に合わせて回転します。ブレーキシューはドラムの内側に配置され、ブレーキをかける時にドラムに押し付けられ、摩擦によって車両を減速させます。
To release the rear drum brakes, you often need to adjust the brake shoes. Locate the adjustment slot on the drum brake backing plate. Using your brake adjustment tool or a flat screwdriver, turn the adjuster in the proper direction—typically counterclockwise to pull the shoes away from the drum. This adjustment will create enough clearance to remove the drum.
ขั้นตอนที่ 1 การออกแบบ
1. Værktøj
Controleer regelmatig de staat van uw remmen. Als u ziet dat de remvoeringen ongelijkmatig slijten of als u een beproefde «high spot» op de remdrum voelt, kan dit een aanwijzing zijn dat ze moeten worden vervangen. Ongelijke slijtage kan wijzen op een probleem met de remklauwen of andere onderdelen van het remsysteem.
2. Materials
Firstly, exceeding the maximum allowable diameter of a brake drum can detrimentally affect the vehicle's braking performance. When the diameter is too large, the brake shoes may not make proper contact with the drum surface. This reduced contact area limits the friction generated during braking, which can lead to increased stopping distances—an alarming safety hazard in emergency situations. Moreover, improper brake drum size can result in uneven wear of brake components, leading to further complications and costs for maintenance.

For instance, the brake spring tool allows technicians to safely compress and remove the tightly wound springs that hold the brake shoes in place. This tool is designed to reduce the risk of injury from spring recoil, a common hazard when working on drum brakes. Similarly, the brake adjuster tool simplifies the adjustment of the brake shoes to ensure optimal performance. This is crucial, as improper adjustment can lead to decreased braking efficiency and increased wear on components.
Brake calipers are part of the braking system and function as the mechanism that applies friction to the brake pads or shoes, which in turn slows down or stops the vehicle. In drum brake systems, the caliper is linked to the brake drum, a cylindrical component that rotates with the wheel. When the driver presses the brake pedal, hydraulic fluid is sent to the caliper, which then pushes the brake shoes against the inner surface of the drum, creating friction that decelerates the vehicle.
Ο δίσκος φρένων 92865 είναι ένα κρίσιμο εξάρτημα στα συστήματα φρένων οχημάτων, που συμβάλλει σημαντικά στην ασφάλεια και την απόδοση του οχήματος. Οι δίσκοι φρένων λειτουργούν σε συνδυασμό με τις ταινίες φρένων για να παρέχουν την απαραίτητη δύναμη πέδησης κατά την οδήγηση. Είναι κατασκευασμένοι από υλικά υψηλής αντοχής, ώστε να αντέχουν τις υψηλές θερμοκρασίες και την τριβή που δημιουργείται κατά τη διάρκεια της πέδησης.
Vedlikehold av bakdrum bremser kan virke skremmende, men med riktig verkty og en systematisk tilnrming kan du utfre det selv. Husk alltid sikkerhet frst!
Vantaggi e Svantaggi
- Vibration When Braking A pulsating brake pedal can indicate that the drum or brake shoes are unevenly worn or damaged.
2. Righello di Profondit Utilizzato per misurare la profondit di usura del tamburo, questo strumento aiuta a verificare se ancora sicuro per l'uso o se deve essere sostituito. Una profondit eccessiva pu compromettere l'efficacia del freno e aumentare il rischio di incidenti.
Đĩa phanh 240Z Tầm quan trọng và những điều cần biết
Can We Change Drum Brakes to Disc Brakes?
Conclusion
अन्ततः, रुकस ड्रम ब्रेक एडेप्टरलाई गाडीको ब्रेक प्रणाली सुधार्नको लागि एक आवश्यक उपकरणको रूपमा हेरिनु पर्छ। चाहे त यो ब्रेकको प्रतिक्रिया क्षमता, सुरक्षा व्यावहारिकता, वा सामान्य मर्मतमा सहजता हो, यसले गाडीका चालकहरूका लागि समग्र अनुभवलाई महत्वपूर्ण रूपमा सकारात्मक बनाउँछ। यसैले, कुनै पनि गाडी प्रेमीको लागि यो अनिवार्य उत्पादन हो जसले आफ्नो गाडीको ब्रेक प्रणालीलाई एक नयाँ स्तरमा पुग्न चाहन्छ।
Le remplacement des plaquettes de frein à tambour est une opération cruciale pour garantir la sécurité de votre véhicule. Les freins à tambour, bien que moins courants sur les véhicules modernes, sont toujours utilisés sur de nombreux modèles, en particulier les voitures anciennes et certains véhicules utilitaires. Comprendre quand et comment remplacer ces plaquettes peut faire une grande différence en matière de performance et de sécurité.Tout d'abord, il est important de savoir quand les plaquettes de frein doivent être remplacées. Généralement, vous devriez inspecter les freins tous les 20 000 à 30 000 kilomètres ou dès que vous remarquez des signes d'usure, comme un bruit de grincement ou une diminution de l'efficacité du freinage. Un frottement anormal, une pédale de frein molle ou des vibrations lors du freinage peuvent également indiquer qu'un remplacement est nécessaire.Le processus de remplacement des plaquettes de frein à tambour peut être réalisé par soi-même, mais il nécessite quelques outils spécifiques, notamment un cric, des clés à molette, et un jeu de tournevis. Avant de commencer, assurez-vous d'avoir à portée de main des plaquettes neuves, car il est souvent conseillé de remplacer les deux côtés pour maintenir un équilibre dans le système de freinage.Commencez par lever le véhicule et retirer la roue. Une fois la roue enlevée, accédez au tambour de frein. Vous devrez probablement retirer quelques boulons pour pouvoir enlever le tambour. Inspectez l'état des plaquettes existantes et du tambour lui-même. Si le tambour est usé, il peut être nécessaire de le remplacer ou de le rectifier.Pour retirer les anciennes plaquettes, dévissez les attaches et retirez-les soigneusement. Installez les nouvelles plaquettes en veillant à respecter le bon positionnement. Remettez tout en place en vous assurant que tout est bien fixé. Terminez le processus en remettant la roue et en abaissant le véhicule.Avant de prendre la route, testez le système de freinage à basse vitesse pour vous assurer que tout fonctionne correctement. Un bon entretien des freins à tambour peut prolonger leur durée de vie et assurer votre sécurité sur la route. Si vous n'êtes pas à l'aise avec cette procédure, il est toujours recommandé de consulter un professionnel. N'oubliez pas que des freins en bon état sont essentiels pour la sécurité de tous les occupants du véhicule.

Rumpujarrujen voitelu on tärkeä prosessi, joka varmistaa ajoneuvosi turvallisuuden ja suorituskyvyn. Oikein tehtynä voit säästää aikaa ja rahaa, ja nauttia sujuvasta ajamisesta. Muista tehdä säännöllisiä tarkastuksia ja ylläpitoa, jotta jarrusi pysyvät kunnossa!
Schritt 2 Räder entfernen
۲. چرخ را جدا کنید
Arxa Tormoz Drumu Avtomobillərdə Tormozlama Sisteminin Əhəmiyyəti
2. Remove the Wheel Using a tire iron, loosen the lug nuts slightly while the wheel is still on the ground. Once you lift the vehicle with a jack, finish removing the lug nuts and take off the wheel.